High Dynamic Range Wedding Portraits
In every wedding there is one type of photo that ALWAYS gets printed. And usually printed quite large. HDR Portraits
How do you shoot these? Process these? Single photo? 3 photos? How to eliminate orange skin?
Full details in this mini-guide below:
HDR or High Dynamic Range is a process of shooting and editing either a single photo or series of photos to fully convey what the human eye saw. In short, the modern camera captures 8-11 stops of light while our eye (more importantly our eye+brain combo) captures up to 24 stops.

DOWNLOAD THESE 3 RAW FILES :)

Think of HDR like a super RAW image. RAW files were a huge upgrade from JPEG.
HDR is that next level up from RAW. JPEG>RAW>HDR RAW
There are 2 ways to achieve this realistic look. You can edit a single photo with an HDR Lightroom preset or set your camera to bracket 3 or 5 exposures followed by blending them in Lightroom.
SINGLE EXPOSURE METHOD
Simply use a preset from the Smart Portrait Preset System on a single photo. I've built 3 presets exactly for this look: FLASH RESCUE, HDR LANDSCAPE 1 and HDR LANDSCAPE 2.

Processed in 3 clicks with the Smart Portrait Preset System. Fuzzy Peaches + Orange Skin Fix 3 + Lighten Skin 4
MULTIPLE EXPOSURE METHOD
When to use? You only need to shoot multiple photos, as opposed to a single photo, when the dynamic range of the scene is extremely high or you would like every single detail in the shadows and highlights to be visible.
This technique takes marginally longer to shoot (~10 seconds) and 1-2 minutes for processing. The results, however, are always stunning! After trying it a few times, the process will become second nature.
Handheld or tripod? Years ago, HDR software was still in its infancy and tripod shooting was a must. Now, HDR software has the option to "Align Images". What a time saver! This allows us to ditch the tripod and shoot the exposures handheld.


CAMERA SETTINGS
In Aperture priority, set the F-stop to the sharpest part of your lens. Avoid F11-22 as this slows your shutter speed too much. Now set up bracketing to -2EV, 0EV, +2EV. Sony and Canon you can do this in 3 exposures, Nikon takes 5. Now for the key to super sharp HDR portraits. Shoot fast! If your camera shoots 6 frames a second, set it for that. Usually called continuous-high. You might already have your camera set in this mode. Lastly, tell your couple they must hold still for 2 seconds while you take 3-5 images. Communicate exactly when you're taking the pictures.
Save this HDR cheat sheet for practice later if needed.
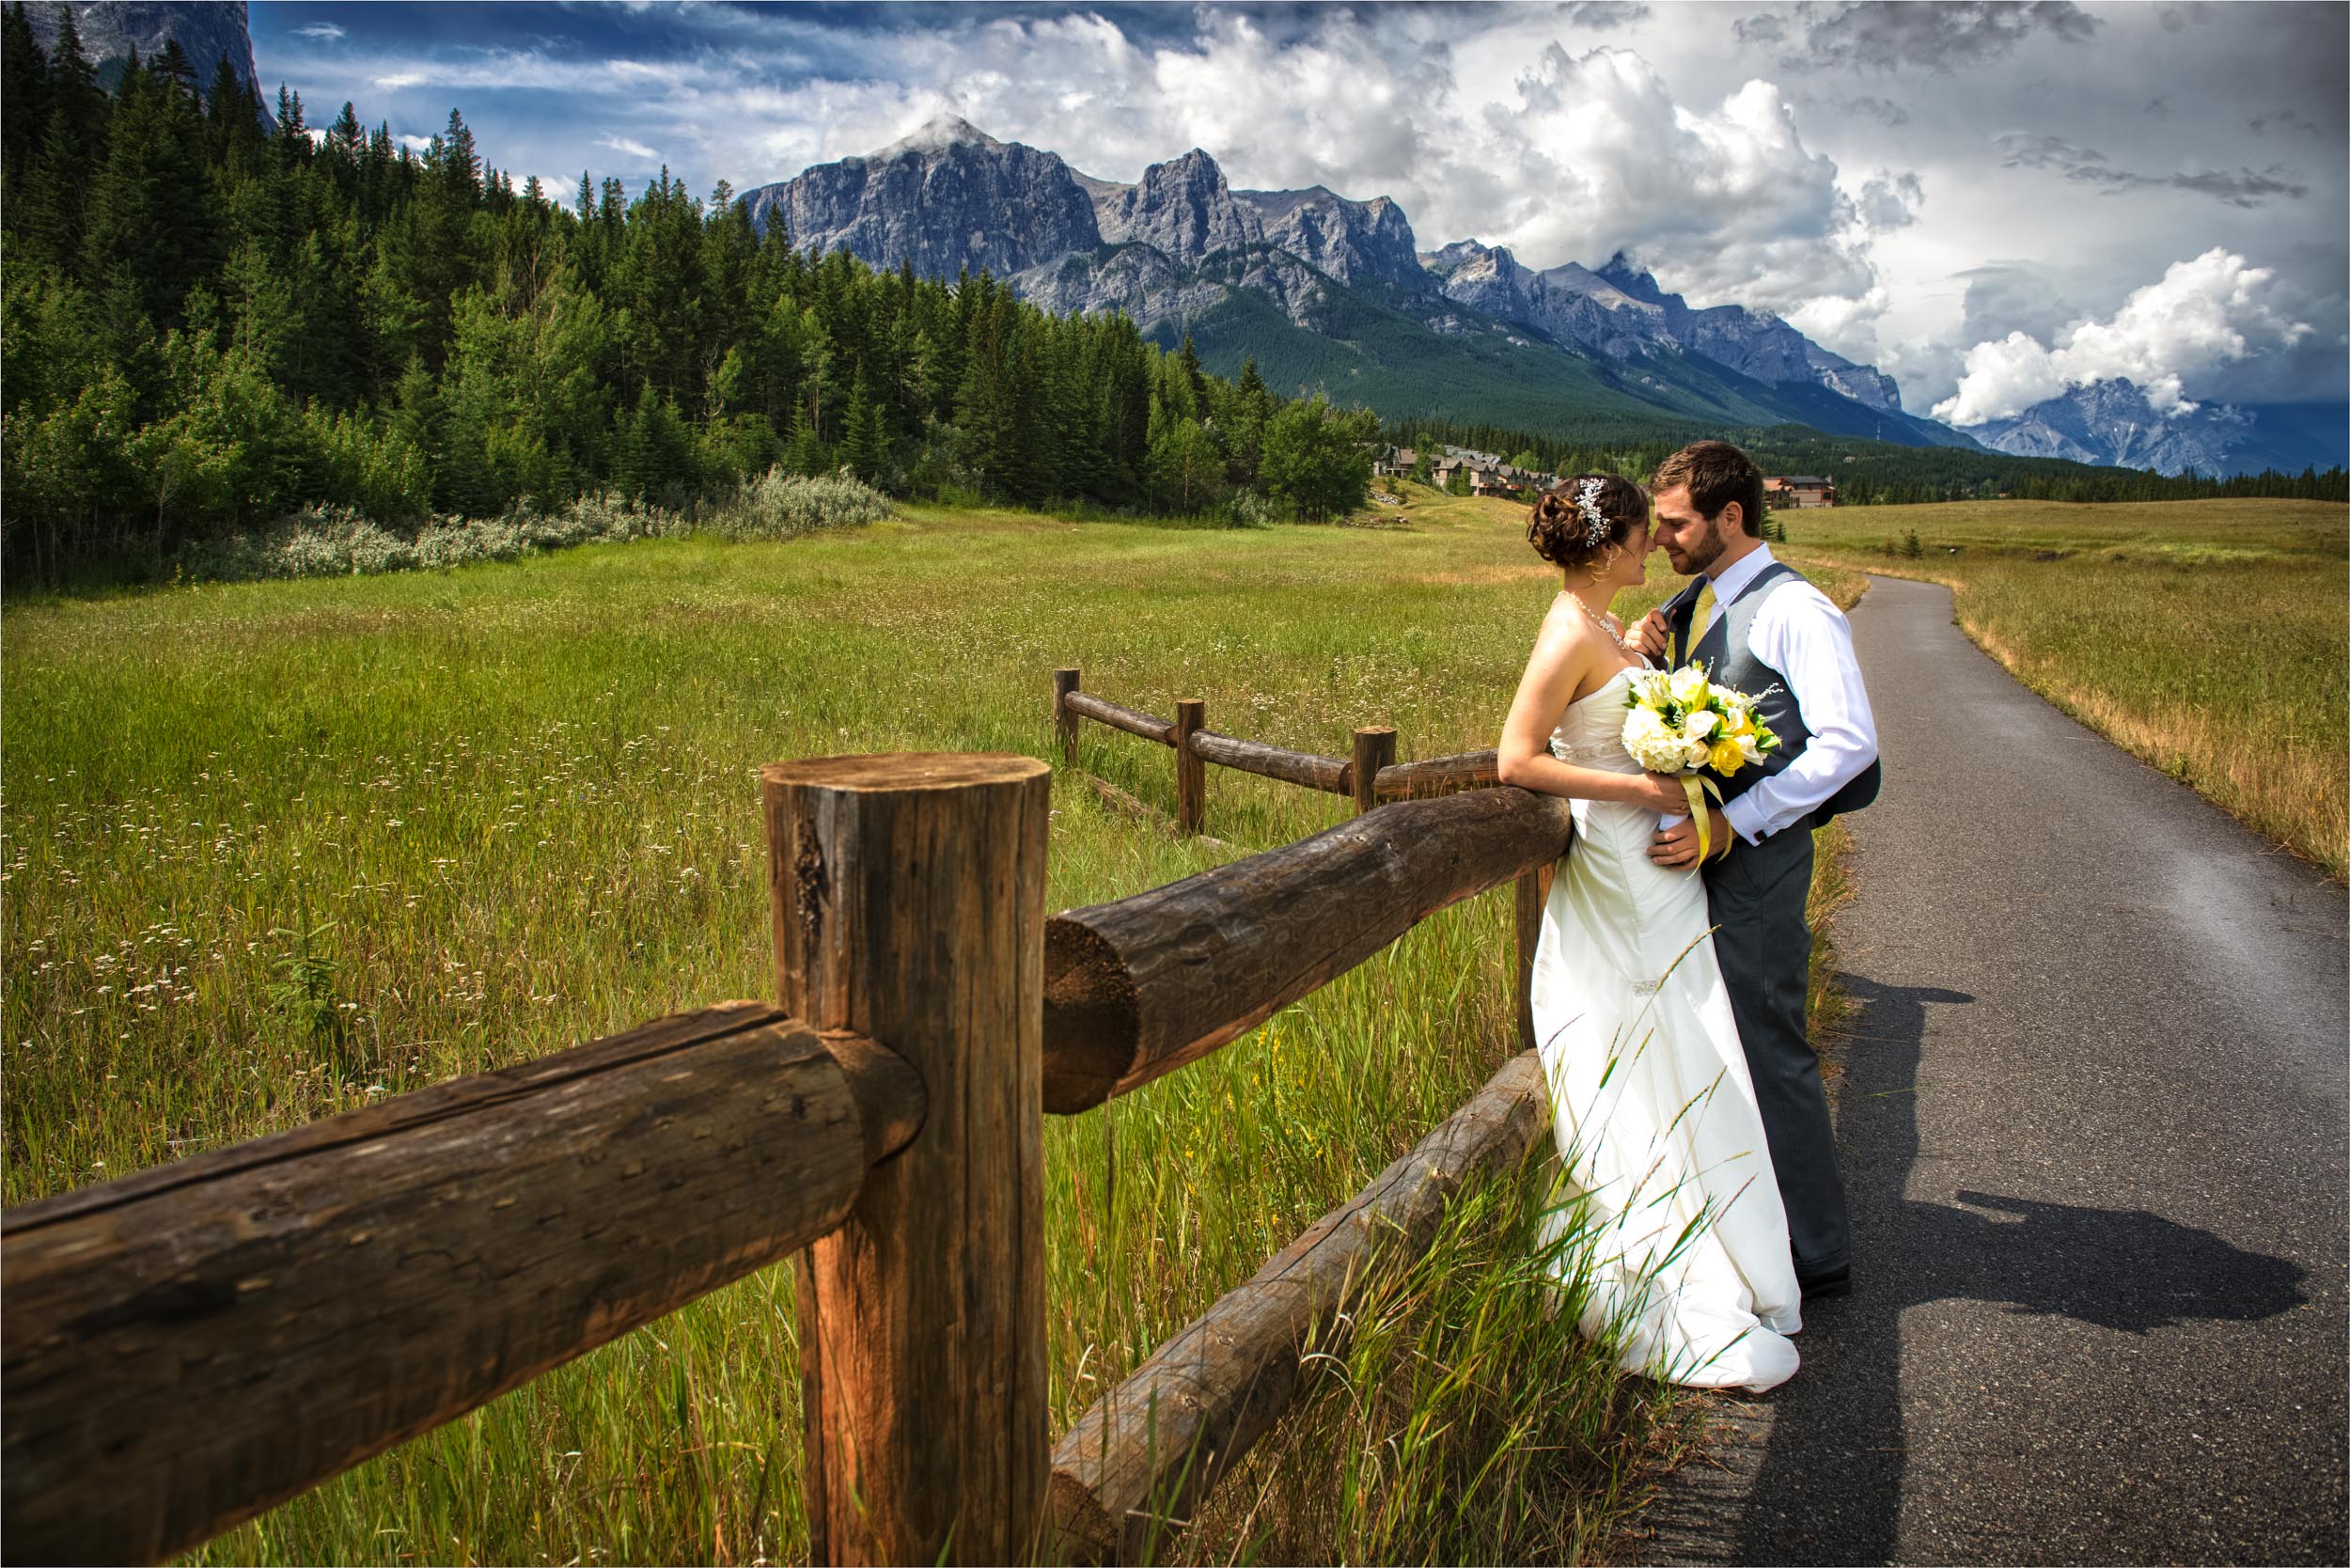
HDR merged in Lightroom. Cropped then processed with 3 clicks. LANDSCAPE HDR 1 + ORANGE SKIN FIX 2 + SHARPENING 2
HOW TO MERGE TO HDR IN LIGHTROOM
Lightroom now INCLUDES HDR MERGING! Not only does it output a HDR raw (DNG) image back to Lightroom, it does a fantastic job at merging the exposures to look "natural". All other HDR software, mainly Photomatix 5 and Nik HDR-Efex Pro 2, creates a very surreal image. Not in a good way. I'd spend forever trying to get the image to look normal.
STEP 1
Load photos into Lightroom
Go to Develop module
Highlight all
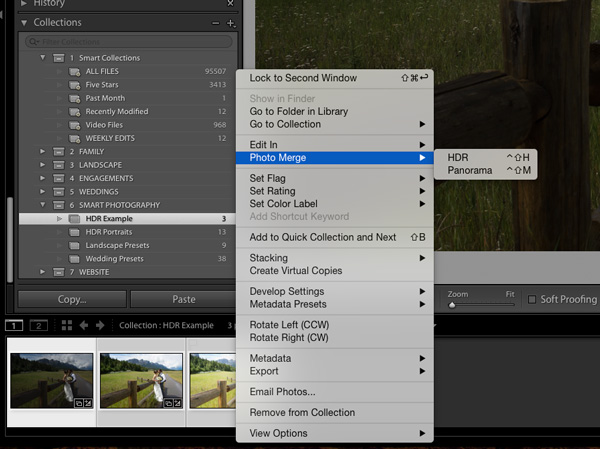
Right click
Photo Merge>HDR

STEP 2
Auto Align Checkbox
Handheld HDR? Check Tripod HDR Don't check
Auto Tone Checkbox
No, I never check this. It tells Lightroom to process your image however it feels. It's like shooting in AUTO. Not good.
Deghost Amount
I almost always use Low or Medium for portraits. Sometimes High gives weird patterns. I only use None on some landscapes. Check the Show Deghost Overlay to see what's being affected.
Click Merge
STEP 3 - Remove Chromatic Aberations
Watch out for the purple fringing around high contrast areas. Just check the box and you're done

LAST STEP - Correcting Skin Tones
Here's where most people go wrong with HDR or other highly vibrant processing. Orange or red shin....Yikes! We've all seen this, the rest of the image looks great except the sun-burnt look. The easiest way to bring the skin tones to normal is through a mixture of lightening the skin tones and decreasing the orange-red-yellow mix of the skin tones. You can do this in 2 clicks with the Smart Portrait Preset System. Or you can go into the camera calibration panel and play with the red and green sliders (this surprisingly makes for the best orange skin fix). To brighten the skin tweak the red, orange and yellow luminance values.
Have fun with this technique! Of all the images my clients print large, the HDR portraits are used 80% of the time. Try it out and let me know how it turned out in the comments below.
Jeff